Make your Open Banking DCR flow test 10 times faster in Postman
I’m assuming you are already familiar with “What is DCR in open banking?” before start reading this article. In case you are not familiar, please use the link here for one of my previous articles on DCR (Dynamic Client Registration).

What is postman?
Postman is a popular API client that makes it easy for developers to create, share, test and document APIs. This is done by allowing users to create and save simple and complex HTTP/s requests, as well as read their responses. The result — more efficient and less tedious work.
DCR flow consist of these steps.
- Sending a POST request containing a JWT body that includes an SSA (Software Statement Assertion)
- Using the client ID received from the POST request to send another POST request to get an access token.
- Using the access token to send PUT, GET and DELETE requests.
This flow is tedious due to following reasons.
POST and PUT requests are JWTs signed using private keys. This signing process usually require the person to use jwt.io website and manually sign them in the web page. This involves a lot of copying and pasting.
Even the POST request that request for access token need to include a JWT called client assertion. This is a onetime use JWT and this needs to be changed and signed all the time.
There is additional copying and pasting as well.
When errors occur due to various reasons, the whole process can get very hard to cope up with. Troubleshooting becomes very tedious.
The solution is to use Pre-request Scripts😃 as facilitated by Postman software.
Let’s start the Postman software and get started with POST request.
For the demonstration here, I’m using UK DCR flow. If you need to see the power of Pre-request Scripts, try to invoke Postman API calls without using them. Additionally, going through the steps given in the below article as explained by WSO2 Open Banking documentation will help you understand the process much better.
Dynamic Client Registration v3.2 - WSO2 Open Banking 2.0.0 - WSO2 Documentation
POST request
In the Postman software create a new request and fill the URL part and Headers tab as below. Since you are sending a POST request, set the request type to POST.
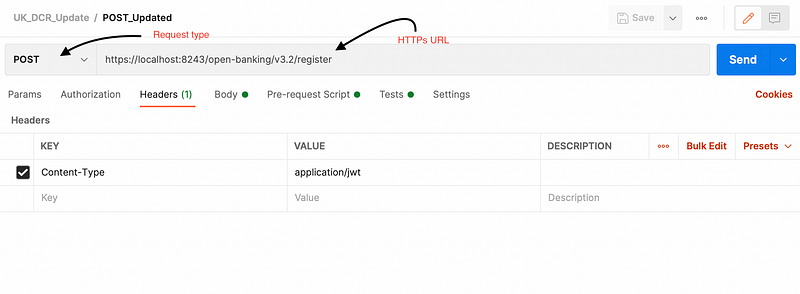
Now the most important part in making the flow x10 faster is learning to use environments and variables in Postman.
Using environments and variables
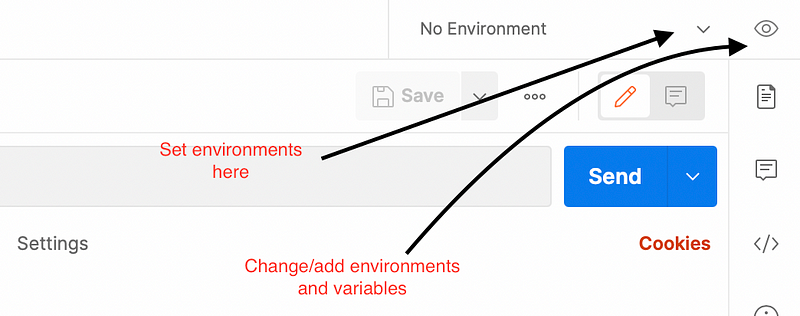
Above is a screenshot of the upper right corner of the Postman software. Please add the following variable names as given below. After creating the environment UK_DCR_3.3, add global variables in addition to environment variables.
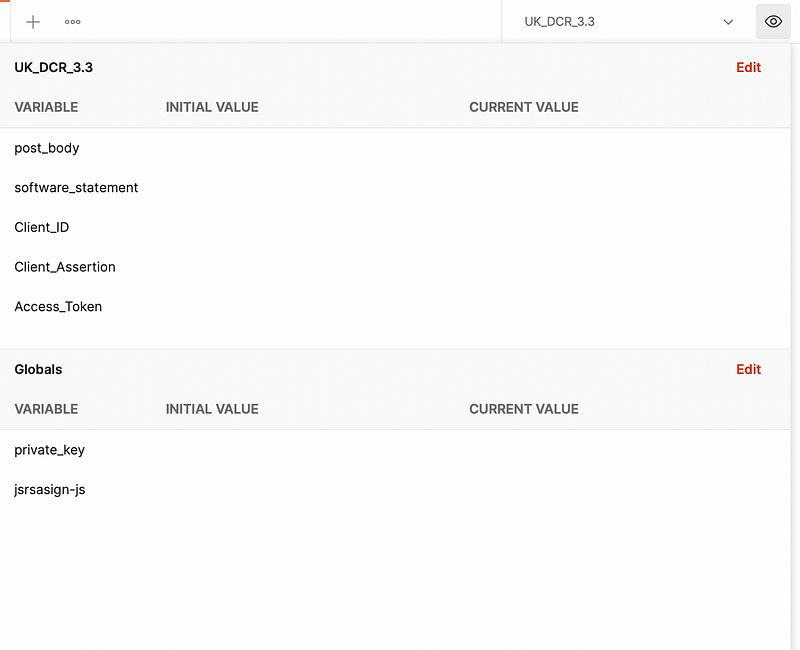
Use of variables and environments make the process very fast by removing the need to copy and paste so many values. Setting the values here and referring them by their variable names is very convenient.
We need to worry about setting values for software_statement, private_key and jsrasign-js. Others are automatically set by the Pre-request Scripts that we are going to use later.
Copy and paste the following text in the software_statement field.
Copy and paste the following text in the private_key field.
Copy and paste the following JavaScript code in the jsrasign-js field. This is a JavaScript that runs and creates JWTs out of JSON texts using the private key given.
With these values in place, now you are ready to prepare the rest of the POST request. Write {{post_body}} to call this variable in the Body tab.

Pre-request Script tab is a little bit tricky. This is a JavaScript code that runs before the request is sent.
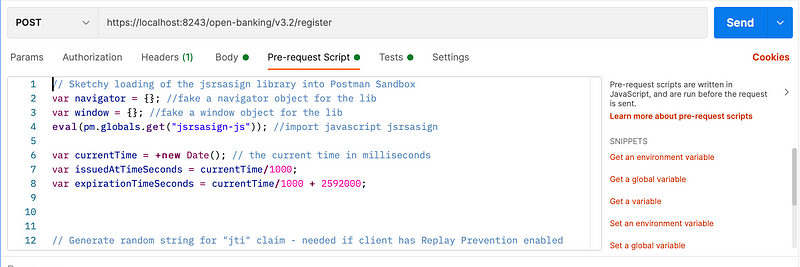
Add the following code in the Pre-request Script tab.
Now your POST request is ready to run. Let’s add this additional JavaScript code in the Test tab. This will provide functionality to grab the client ID received in the response, when the response is received.

If not for the first attempt, you will be able to get this POST request working after some troubleshooting. Just remember that this seems complex at first glance, but using JavaScript will make the process a lot faster.
Let’s move on to the next request in the DCR flow, which is the request for obtaining the access token.
Obtaining the access token
Try to create a new request as given in the following screenshots.

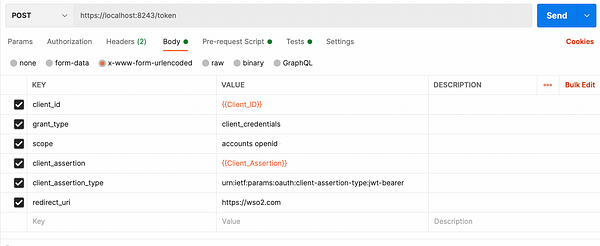
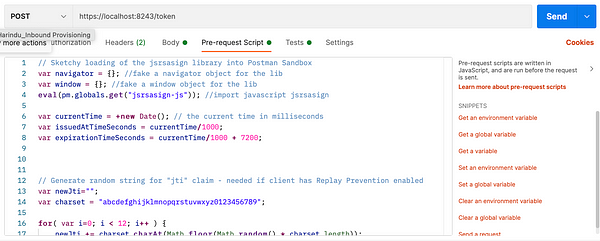

Given below are the Pre-request Script and Test script for this request.
The Test script grabs the access token received from the response. Now using this access token we can send PUT, DELETE and GET requests. After getting thorough with first two requests I explained above, PUT-GET-DELETE requests will not be a big challenge. You will definitely be able to experiment and get these last three requests done. Given below is a screenshot of the PUT request.

Good luck troubleshooting and going through the rest of the DCR UK flow!